Blackmagic-URSA-Mini-Pro-12K__

Is a 12K Cinema Camera really necessary?

From my perspective… yes.
It pushes the industry forward.

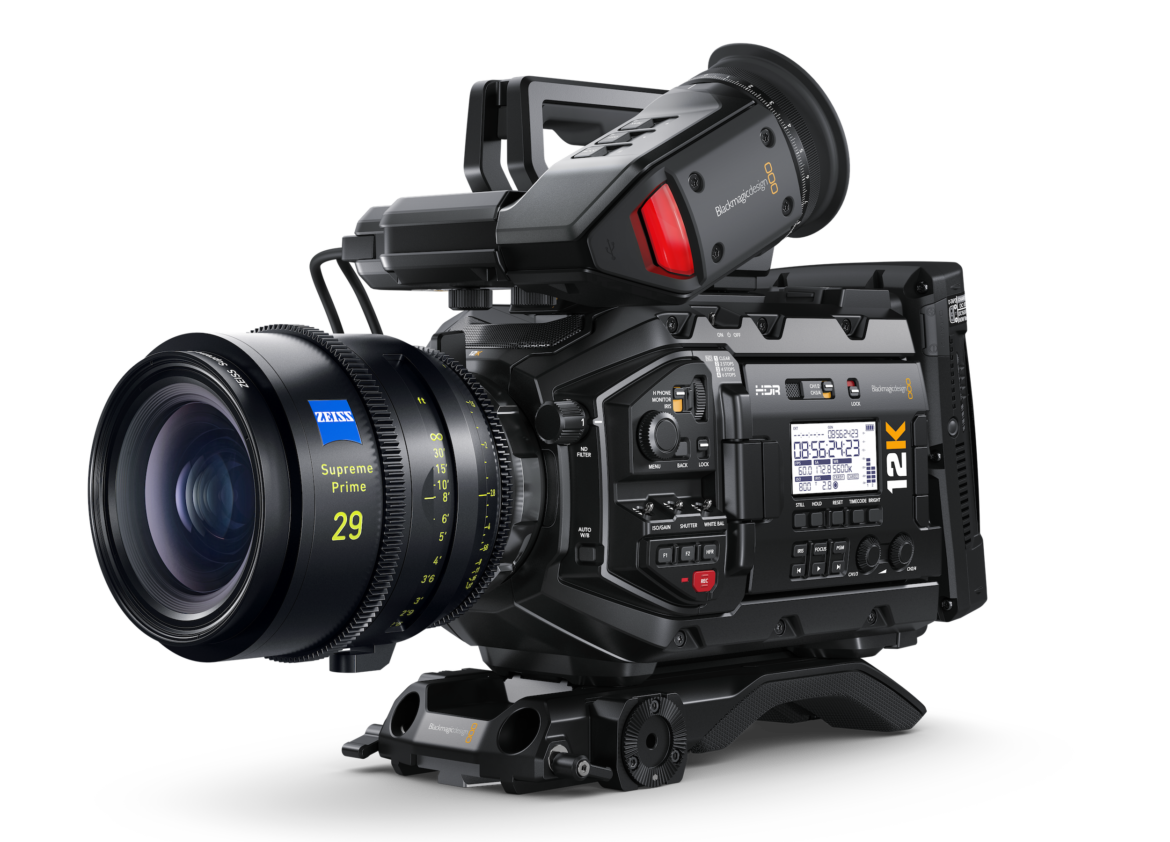
On July 16th Blackmagic Design introduced the Ursa Mini Pro 12K cinema camera. The announcement seemed like a lofty direction given that competitors are slowly rolling out 4, 6, & 8K cameras. It definitely took me by surprise, but as I digested the information and played with the 12k Ursa footage, Blackmagic’s direction began to make more sense.

On the surface, a 12K camera seems a little excessive when you directly compare it to current camera offerings. But if anything… it challenges others to ramp up their camera innovations and take larger risks at better price points. It’s refreshing to see this large technology leap, rather than a small incremental change meant to protect a product line or quarterly profit margins.

Real innovation is difficult from year to year, but if a company can add value to a customer’s bottom line, the reward is usually a purchase. With this announcement, Blackmagic’s offers 14 stops of S35mm 12K raw editable on fairly modest gear. I’m sure some marketing and engineering teams have taken taken notice.

How the industry, DPs, and end users respond in time remains to be seen. It’s always challenging to make inroads into industries where folks might not see the need to change. We’ve been marketed in “K’s” and megapixels for so many years, but ultimately it’s the final footage that matters. My hope is that this camera offers a real alternative to higher priced REDs, ARRIs, and Canons.

My Initial Reaction

This thing will need gobs of storage along with an abundant amount of processing power to get reasonable performance. Raw 12K feels like overkill in a HD/4K world. Does packing that many photo sites in such a small space really make sense?

As I dove deeper into their technology, graded the raw clips, and learned more about their camera/codec technology, I began to understand the reasoning behind the design choices they made. After playing with several clips, I came to appreciate their achievement: a high dynamic range symmetrical 12K/8K/4K BRAW format we can edit on laptops.

Once you work with 12K imagery as a starting point, it’s hard to go back to undersampled Bayer 4K video. The bottom line for me, there is a crispness and tonal smoothness to the imagery that is a pleasure to work with, nice skin tones, and no over sharpened artifacts here. I’ve worked with raw workflows for 7 years now, BRAW makes it even easier with less storage overhead. While I hoped this announcement would introduce a global shutter 6K Full Frame sized sensor with killer AF, for practical purposes, S35mm with a manual lens still serves 96% of my needs for the foreseeable future. With this current sensor/codec technology, they lay a solid foundation for exciting hardware and software developments.

Blackmagic essentially developed a 12k spec that no one asked for. Why?

As we shift from HD to 4K as a deliverable of choice, my guess is Blackmagic was looking to create the best looking full RGB 4K. If you divide 12,288 by 3, you get 4096. Divide 6480 by 3, and you get 2160. I believe their goal was to develop a chip that is tuned to capture great color (…and dynamic range given those white photosites).

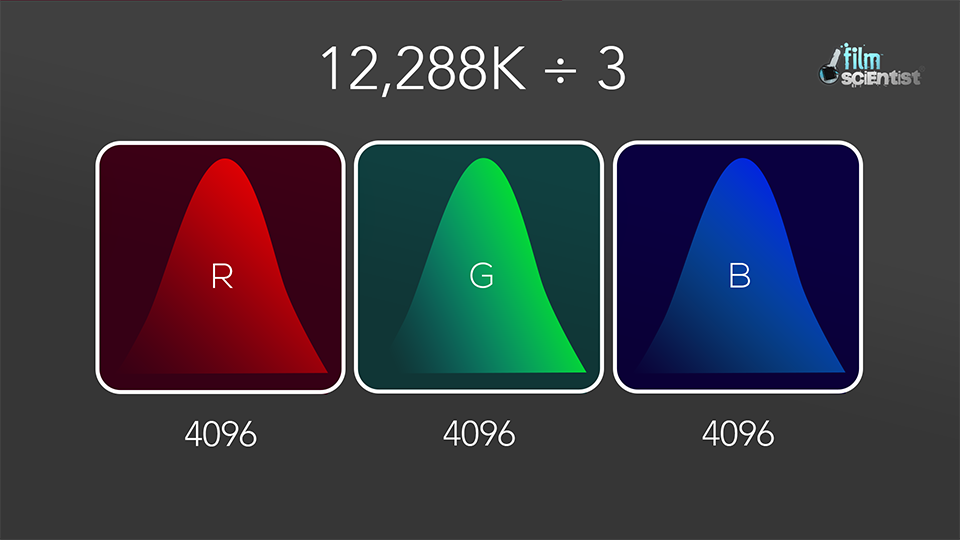
As filmmaker, I am always looking for archival mediums that stand the test of time. Film was “it” for a while. Now the data equivalent is raw sensor footage. While we’ve had “4K” cameras for a while, there are many different flavors that have defined it over time. In the film world, when digital intermediates were first introduced, it was based on scanning 4,096 red photosites, 4096 green photosites, and 4096 blue photosites to create an image 4096 pixels across. With the introduction of “4K” cameras in the mid 2000’s, the idea of what constituted 4K started to get watered down because of marketing. With URSA 12K, it looks like we’re closer to fully oversampled RGB 4K based on actual captured data.

From my perspective, Blackmagic is a company led by some bold engineering choices rather than marketing teams. While it’s easy to sell resolution K’s from a marketing standpoint so consumers can understand it, things like dynamic range, color, skin rendering, and gradeability (is that a word?) are harder to define in the real world with consensus.

79,626,240 photosites, but it’s all about the design.

12,288 x 6480 is a nice big number, but if you look deeper into this new sensor design it offers benefits to color and dynamic range.

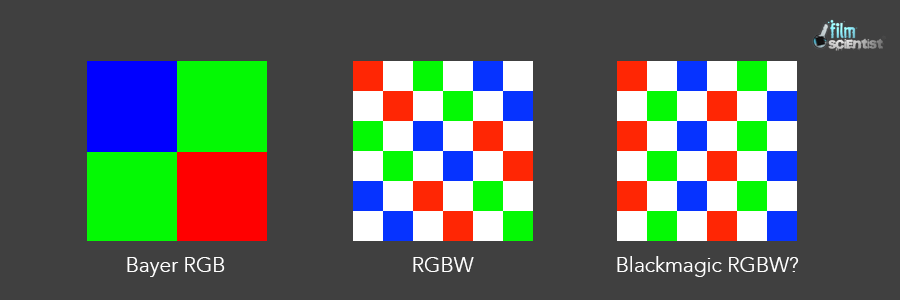
Blackmagic spent 3 years developing a custom chip, an alternative to the traditional Bayer colored filter array. With the addition of clear photosites to the colored filter array we take advantage of capturing true luminance data. That same information can be also be used to calculate more accurate color depending on how nearby pixels are combined. With this announcement, Blackmagic leads the way with a new type of RGBW CMOS sensor for cinema, at a resolution that gives still photo cameras a run for their money.

RGBW sensor technology has been used in smartphones the past several years to overcome their tiny sensor area. I’m sure you’ve all seen dramatic photo improvements on your iPhones and Samsungs lately. Now Blackmagic becomes one of the first to apply it to S35mm cinema for some nice imaging gains. With this novel amalgamation of sensor + codec + software processing, Blackmagic has made 12K a viable capture medium that seamlessly works together through their entire imaging chain.

Diving Deeper
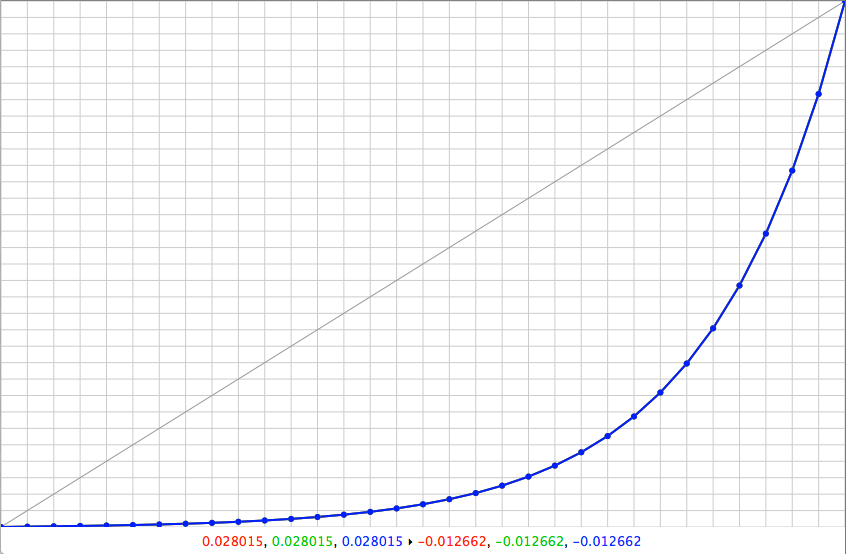
As I dove deeper into their documents this past week, I got a glimpse of their innovative engineering and novel processing they’ve applied to Ursa’s 12K sensor. It takes advantage of collecting data from filtered and unfiltered photo sites to calculate an image with greater dynamic range.

It captures red, green, blue, PLUS unfiltered white light. Because white light contains the full spectrum of all the other colors they can use math to combine this wideband data with the information captured from nearby filtered photosites to better calculate each combined pixel (allowing for a better signal to noise ratio). The differing sensitivities of the wideband and colored sites can also be combined & processed in new ways to essentially act as a dual gain device at the sensor level. And because the wells on the filtered RGB sites don’t saturate to the same level, they also act like low pass filtration. Benefits to dynamic range and color channels are possible because of the sheer number data points, and applying various vertical and horizontal processing algorithms further refines this data.

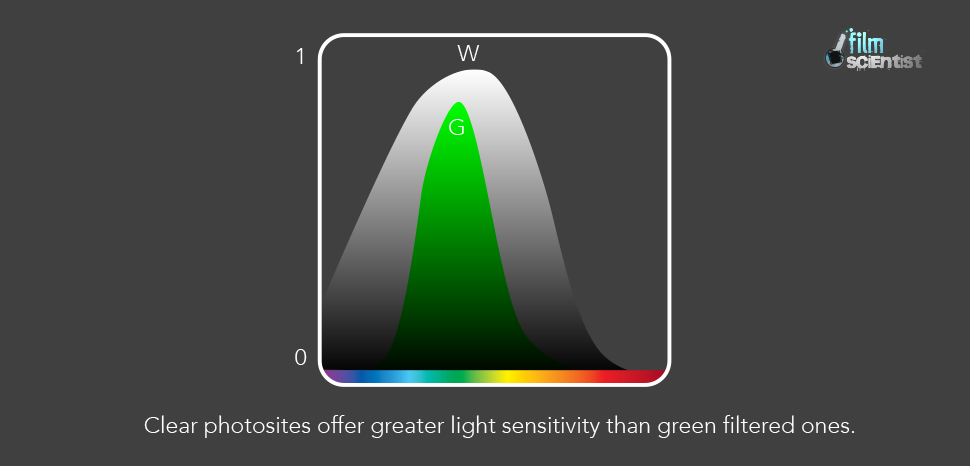
A white photosite is better at capturing luminance than a filtered green photo site because it is unfiltered. So while Bayer sensors derive their luminance from the combination of red, green, and blue; having a clear sensor allows the sensor to measure luminance directly, it’s not solely an interpolation from RGB filtered sites. So we’re essentially removing one more veil through the measurement of real data. As this technology matures, my hope is that we’ll start reaching even deeper into those blacks too. RGBW is the next evolution in sensors, so it stands to reason with time they’ll progress to even larger ones.

While packing so many photosites into a S35mm sensor seems counter-intuitive, it’s the combination of “w” photosites with BRAW working along side it that makes all the difference. It looks like they’ve spent a great deal of time developing and designing BRAW from the ground up to maximize the data captured by this sensor in very specific ways. Their unique array of clear photosites to capture direct luminance information allows for easy scaling to 8K & 4K. Previous generation Bayer Sensors consisted of RGB arrays that usually doubled the green photosite to derive luminance information and didn’t allow for raw scaling without cropping. With RGBW sensors, luminance is directly captured directly at the photosite level.

This is not a traditional Bayer sensor like RED, Canon, or Arri cameras. The large amount of silicon devoted to capturing luminance in this array works much like how our eyes work balancing our vision between rods and cones. My guess is that it makes a great black and white camera too.

Why do we need those extra photosites?

Beyond the obvious answer of better resolution, the extra luminance photosites allow us to extract more dynamic range and better color conversion when processing each pixel.

While there is an aspect of oversampling that happens because of the shear number of them, it’s genius is in it’s ability to use the extra unfiltered white channel to derive better color & dynamic range through the math based on this new sensor arrangement. Because white light contains a combination of all colors they can use the data gathered from those photosites to do math to calculate adjacent pixels. The BRAW processing can subtract red, blue, or green signals from white to arrive at different values. The is where BRAW works to extract the information in the most efficient way for use in their post imaging pipeline. Given the sheer amount of data captured, it also leaves room for future color science improvements as processing algorithms improve. Based on the patent documents online, it seems like this clear photo site works to dramatically improve light efficiency when calculating pixel luminance (contributing to overall dynamic range.) while also aiding in distinguishing / improving color during the de-mosaic process.

What does this mean relative to the final image?

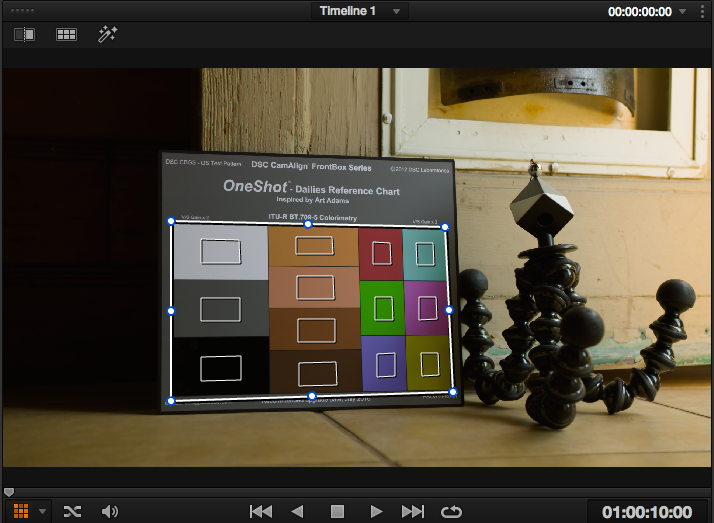
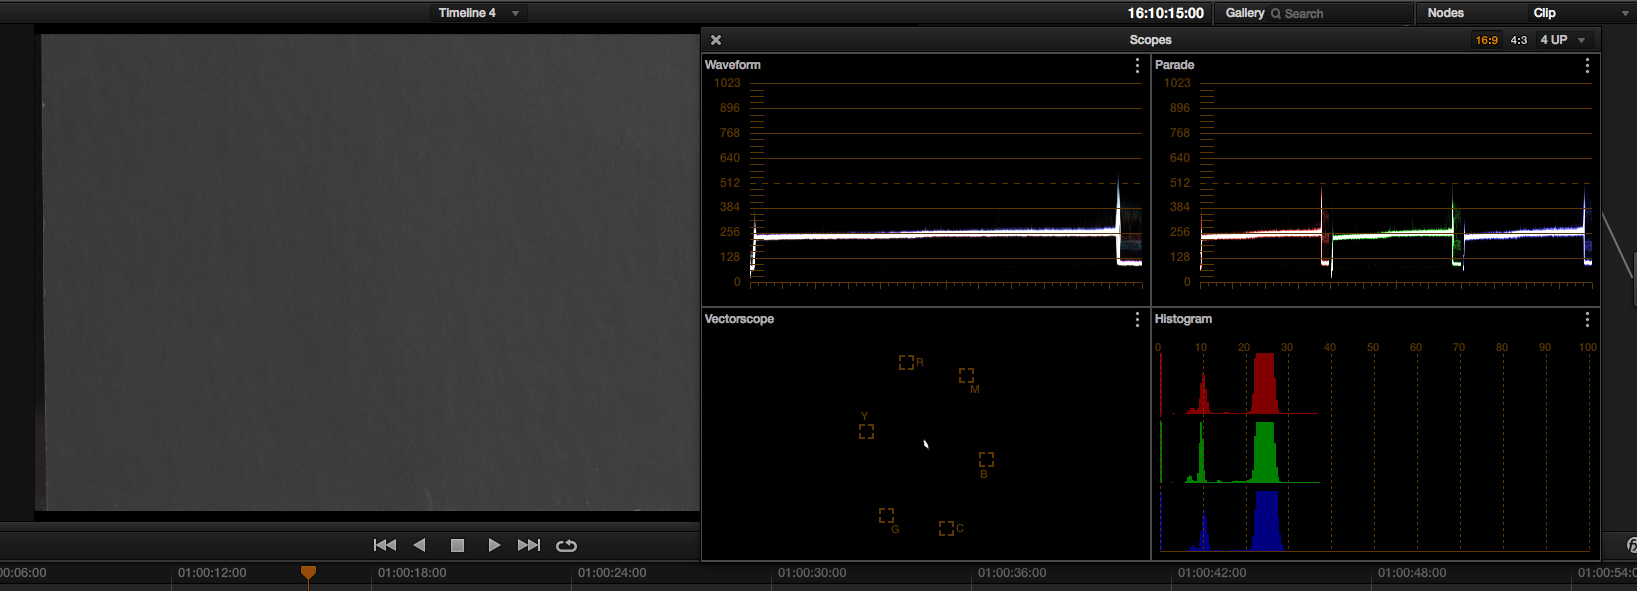
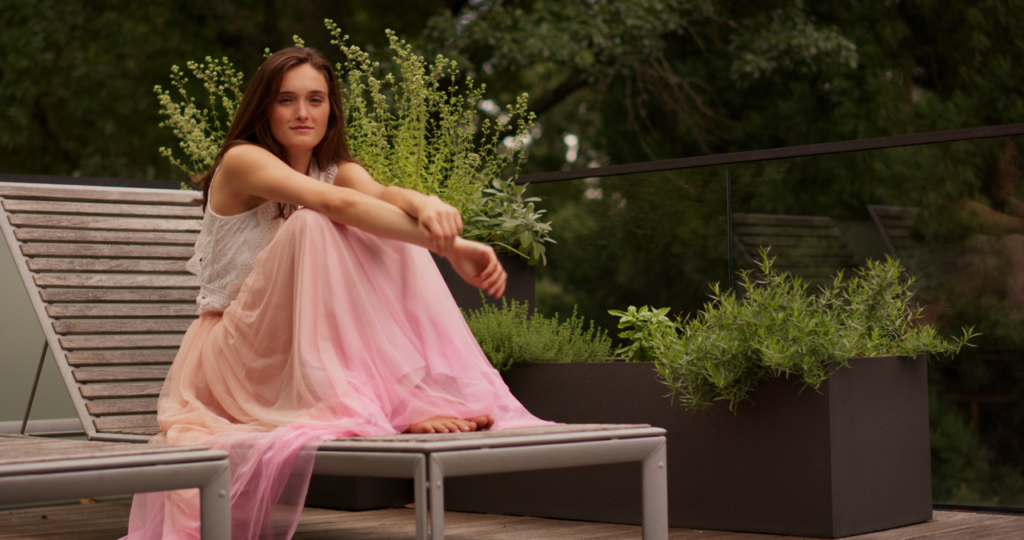
Based on the test clips Blackmagic / John Brawley shared, I feel like colors are more subtle and skin tones are more true to life. I’m excited at the clarity and color Blackmagic has achieved, along with their efficient use of the data captured.

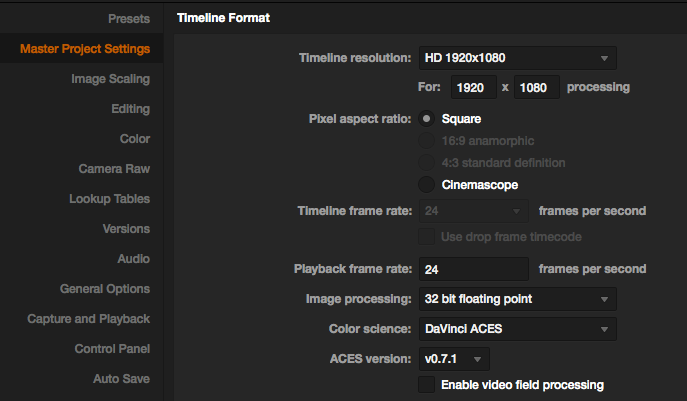
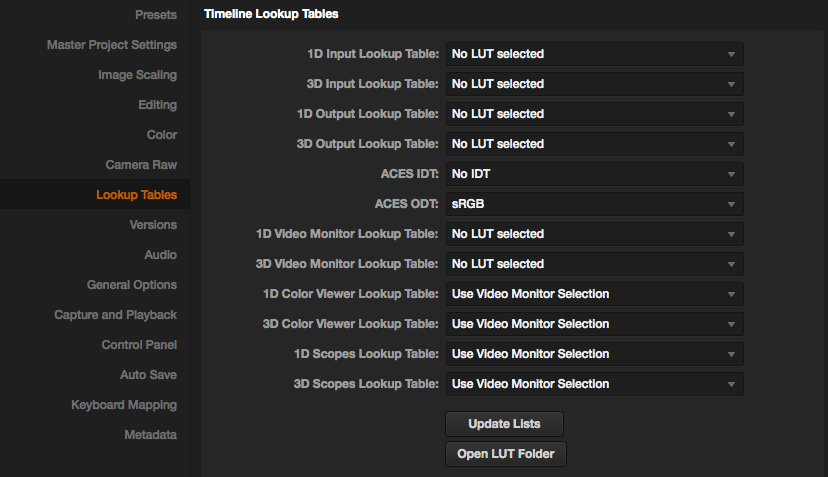
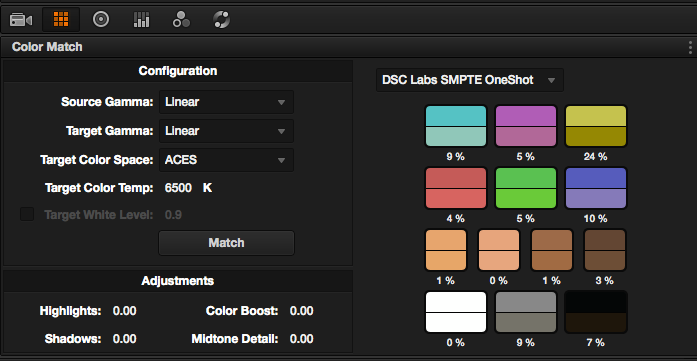
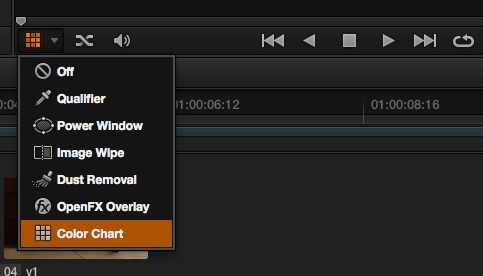
Here is downloadable test footage I graded on a 4K timeline using their native workflow…

Graded still from Resolve, using their native RGB workflow
Graded still from Resolve, using ACES color science (*camera has yet to be profiled)

Who is this camera for?

This camera seems targeted to folks looking for a more economical option to an Alexa or Venice. If your goal is oversampled full RGB 4K, serious VFX, or content for very large scale projection/LEDs, it might be good to consider this camera. Pulling a truly high resolution 80mp still from video is also a welcomed bonus. The ability to do a deep crop (while never a substitute for change in perspective) is also available should your lenses resolve the detail. Basically if you are looking to craft an exacting image with great color, less aliasing & moiré then this camera is for you. It might not hold the prestige levels of some other cameras just yet, but from what I can see from John Brawley’s footage, it delivers the goods.

Ultimately, this camera basically gives artists a wider canvas to create their work. Really can’t wait to see it in more hands of talented DPs. With so much flexibility in resolution, scaling, and frame rate I’m excited to see what’s possible. I’m also curious to test the moiré limits, and see how well one can key hair in challenging environments. Would also love to get better understanding of how the sensor’s real world MTF translates to lenses of various eras. It might be the ultimate cinema lens tester.

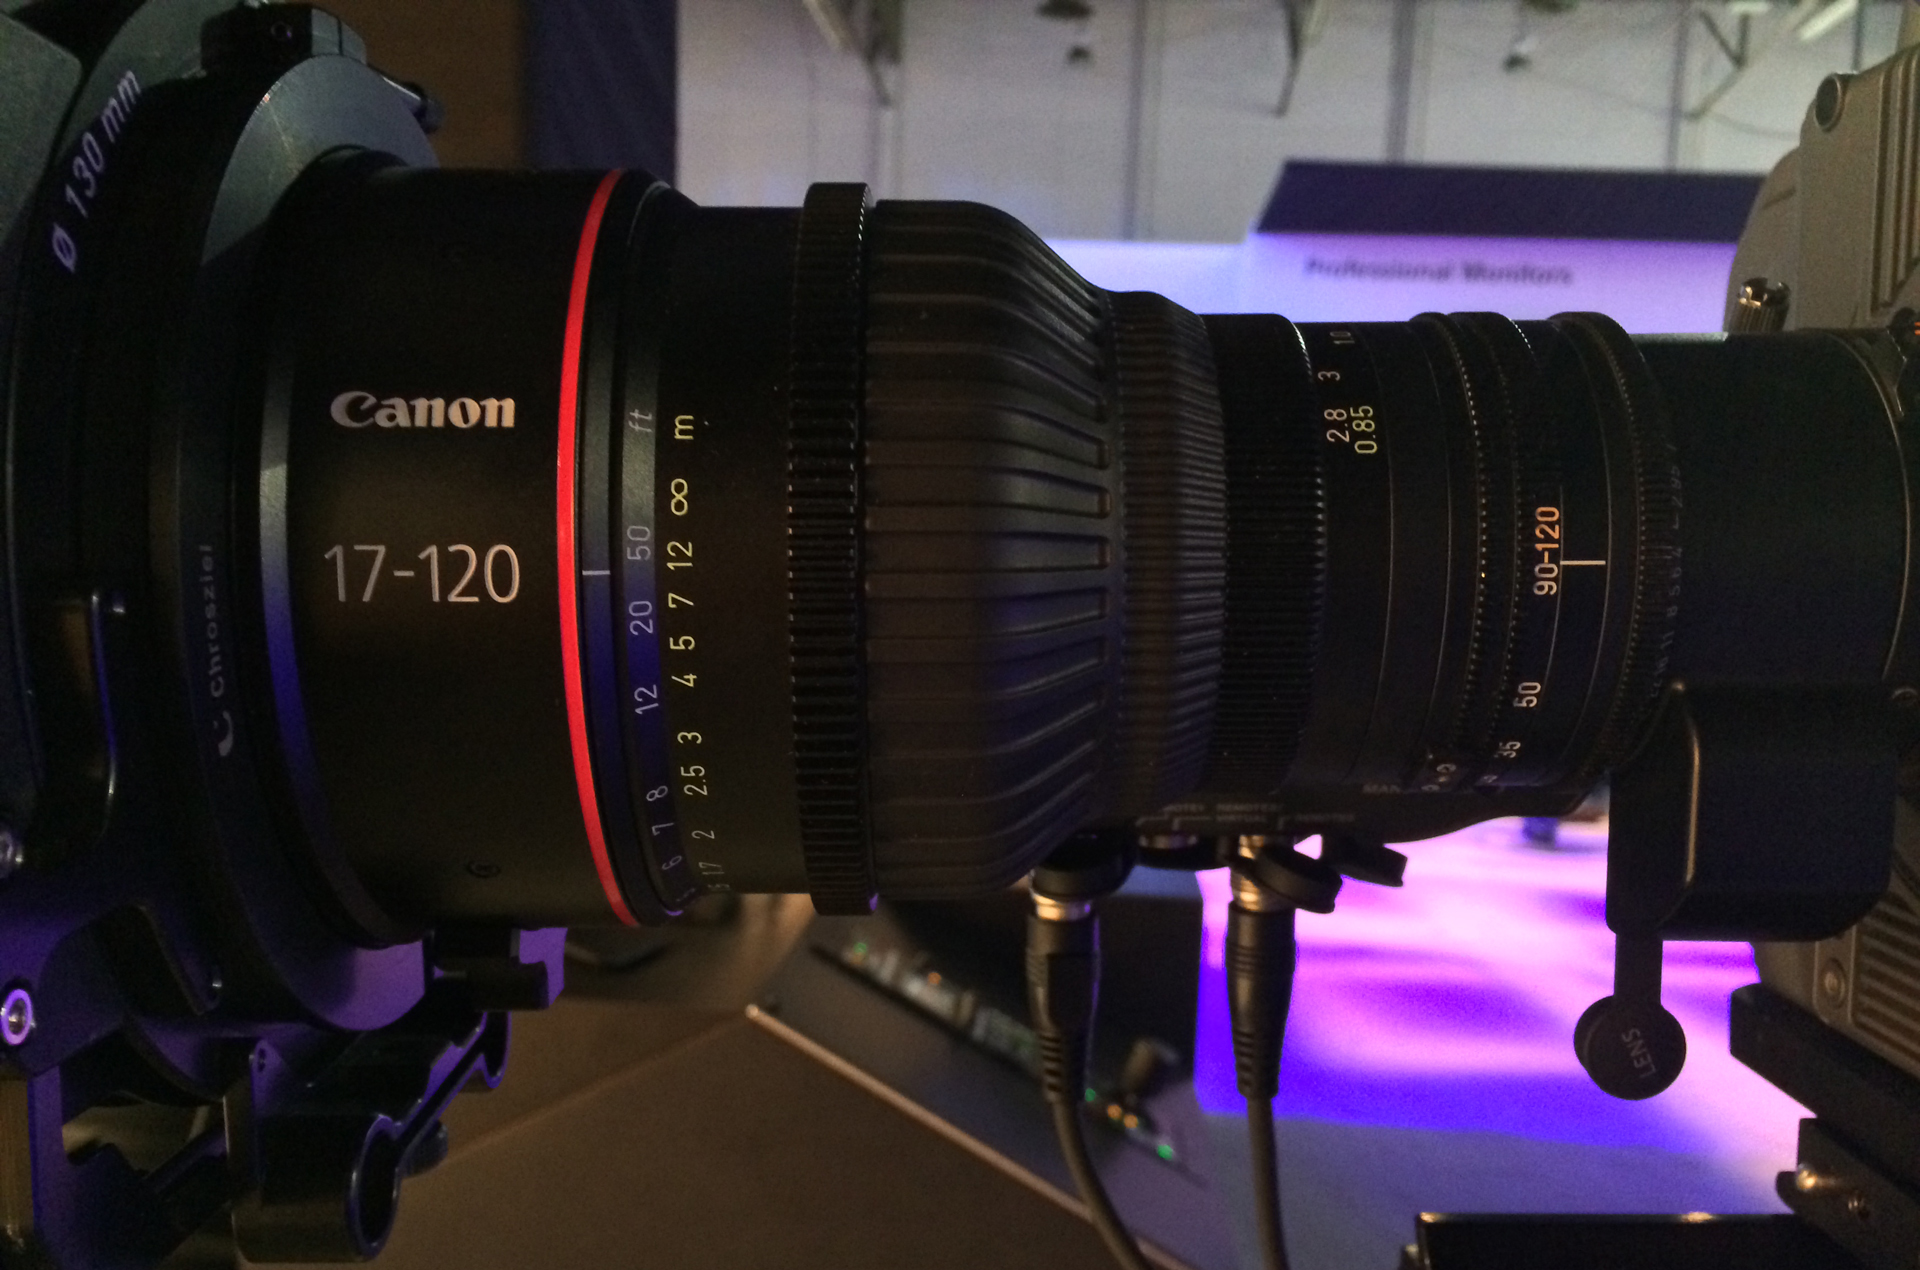
Limiting Factor: Lenses
Given it’s ability to resolve incoming light, this sensor will probably reveal lens characteristics in their full glory… good and bad. Deficiencies like chromatic aberration or edge softness will no doubt be magnified, so to maximize our results we’ll need to “up our lens game”. I have no doubt the putting an amazing lens in front it will yield an amazing results. The challenge will be finding a lens set up to the task of resolving that amount of data. While vintage glass might be good for certain looks, modern glass might be the best solution to fully resolve the capabilities of this sensor when you get to HDR finishing.

Why go with S35mm sensor size when other players are going Full Frame?

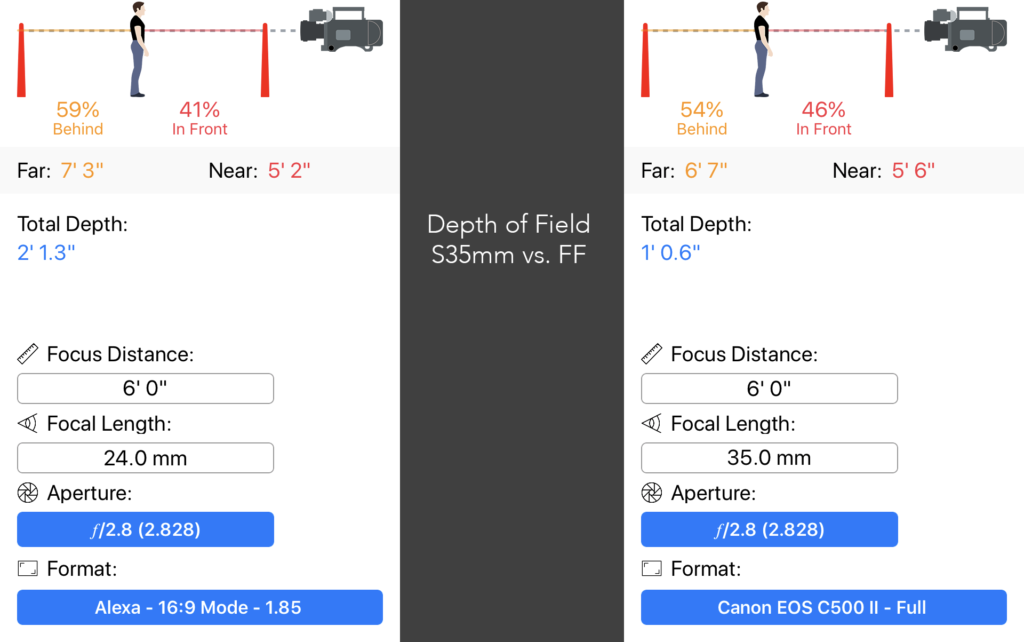
There is a reason the Super 35mm sensor has been the sweet spot for motion capture for so long. It provides a good mix of efficiency related to light, aperture, lenses, and depth of focus. Basically it balances the right amount of light capture with achievable focus. When your working with a crew lighting to T2.8 or T4 on S35mm, it’s much easier on your focus puller than achieving critical focus on Full Frame T2.8. The moment you go with a larger sensor size, focusing accuracy needs to increase dramatically because depth of field and lighting requirements change based on the longer lensing needed to match field of view. There is a smaller margin for focus error with Full Frame.

Given the current state of autofocus technology across the cinema industry, I’m okay that Blackmagic has foregone the current industry marketing push for “full frame” cinema. It seems like a good call for now. Given the camera’s current size, once kitted out, it’s more of a “cinema style” camera anyway, so solid focus pulling will remain critical for best results. While I hoped this announcement would introduce a global shutter 6K Full Frame sized sensor with killer AF, for practical purposes, S35mm 12k with a manual lens continues would serve 96% of my needs.

The bottom line

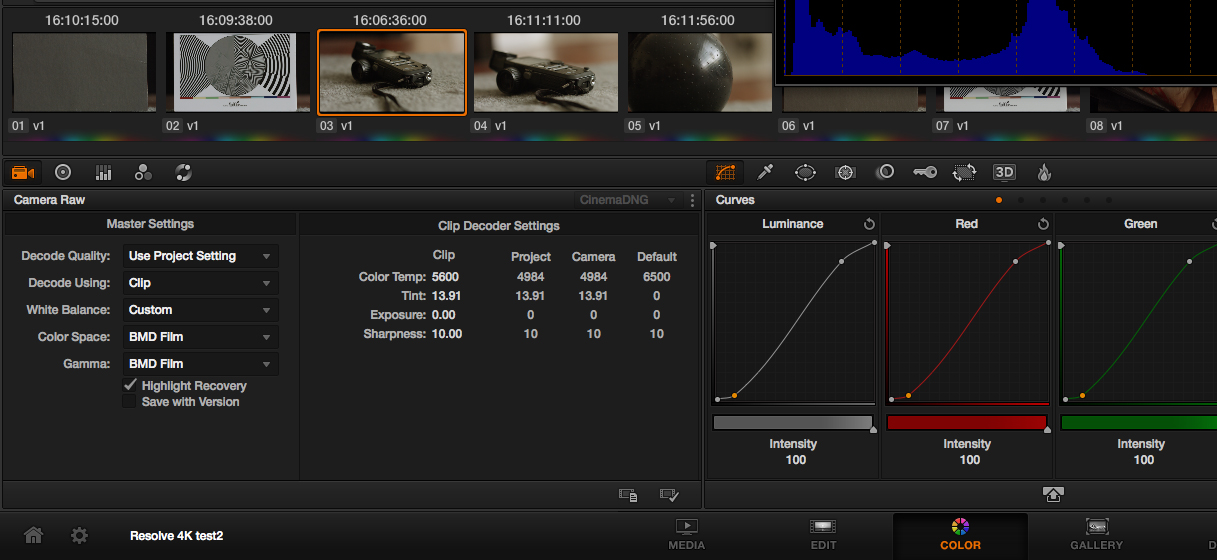
What it really comes down to is overall processing efficiency. 12K resolution doesn’t matter if you can’t actually work with it. I was able to edit and play back 12K sample clips onto a 4K timeline my old 2013 Mac Pro. While the machine chugged when I added Neat Video Noise Reduction node (as with most 4K footage), 12K playback was smooth if I turned off my noise reduction nodes.

The ability to use seven year old hardware to edit footage from the latest 12k camera speaks to Blackmagic’s engineering prowess and their ability to accomplish more with less hardware. I wouldn’t recommend such an old machine for daily professional use on 12k material, but it’s possible and usable with a few caveats. The same cannot be said for some of the 6k/8k camera technology coming down the line from other manufacturers.

Million Dollar Color Science / Color Grading Advantage

Blackmagic is in the unique situation because Davinci Resolve completes their high end image processing workflow. Blackmagic offers a full end to end solution, from camera, to codec, to editing, audio mixing and VFX. In terms of its design cohesiveness, I think the only comparable company offering a similar end to end philosophy is Apple.

The original DaVinci Resolve Grading Suite literally started off as a million dollar solution utilizing custom hardware available to very few post facilities. It transitioned to became a desktop solution that has changed the face of color grading. It’s one a piece of software that looks complex on the surface, but if you take the time to learn it, the program will reward you with the ability to craft amazing imagery.

So if we step back to assess this new sensor technology with Blackmagic’s expertise in color science then we really start cooking with fire. Cameras of ten years ago had heavy duty DSPs for color science and custom chips for heavy encoding. With modern raw cinema cameras, this color processing has shifted to computers during post-production. This is where I believe Blackmagic gains an advantage with Resolve. They get to tailor their camera specifically to their non linear finishing tool to offer the best possible color science that evolves with the program.

If Blackmagic 12K truly offers comparable dynamic range and color science to the Arri standard at a budget price, we might start to see the playing fields begin to level with regards to price. RED gets credit for starting the 4K marketing wave back in 2008. Now in 2020, Blackmagic offers 12K with scalable 8K & 4K raw without cropping. I am excited to see continued testing with industry DPs once the camera becomes available.

Closing
I give kudos to Blackmagic for keeping this technology quiet for so long, no small feat. At a time when everyone has a cameraphone in their pocket & social media is just a click away, I understand the challenge of secrecy. It’s something that can only be achieved with a tight knit team working together to achieve the same goal. With many technology companies driven by marketing committees or shareholder desires, I applaud Blackmagic’s engineering vision to help the cinema industry move forward.

What I like about Blackmagic is that they deliver innovative technology to the masses at a viable price point while embracing open standards. The BRAW SDK is available to all, and non proprietary SSDs can be used for media capture.

I love seeing smaller companies truly innovate for their customer base, they’ve earned my loyalty as customer since 2013 with DaVinci Resolve and their 4K Production Cameras. Their products continue to provide great value through the years. I can’t wait to shoot with an Ursa 12K.

My Own Journey
Blackmagic Design has always been ahead of the curve in many ways. I moved from Avid to FCP in 2002, Premiere in 2010, and Resolve in 2013. Each transition in software came as a result of my need to achieve results the previous NLE software couldn’t tackle.

In 2013, the catalyst for my full shift to Resolve came in its ability to edit & grade raw and DPX timelines way before their competitors. In the end, I tired of competitor’s subscription models, and shifted to Resolve as a my full editing/grading/finishing solution & haven’t looked back.

The Resolve key that came with my first Blackmagic Camera still works today. Seven years later, my 4K Production Camera still delivers great footage and is still one of the few with global shutter. Today, I am marveled that I can edit 12k BRAW with Davinci Resolve 16 Studio on a somewhat dated, underpowered computer by current standards. How is that for value and engineering efficiency?

Reference: https://patents.google.com/patent/US20190306472A1

Capture raw … not compressed.

This is my personal philosophy on why to capture all footage in raw format when possible. Depending on the type of content you shoot, your needs may vary. Over the years I’ve collaborated with countless well respected industry professionals in production and post-production. For the past twenty years, I’ve worked in advertising and marketing, this blog is a distillation of much of that knowledge…

Since college, I have focused on crafting content that is 3 minutes or less. I grew up in an era where motion picture film still existed. It was expensive to shoot and even more expensive to process. Before the advent of 4K, 5K, & 6K digital cameras, film was the standard for professional capture. 1000 foot rolls were the largest magazines you could mount on a camera. This meant you could roll for seven minutes and then you had to “cut”. Today we have the ability to record in an unlimited fashion. Back when we shot film, actors were allowed to take a break every time we changed mags. The cadence was different. Limitations are a good thing, they force us to be creative.

Four Reasons to shoot raw.
1. Discipline.
2. Quality.
3. Intention.
4. Archiveability.
In time my hope is that you begin to understand, limitation is often what makes us a better filmmakers.

Discipline = Vision

Raw files take up a lot of storage space, limiting the amount you can shoot on any given day. So why limit your shooting ratio or encumber your ability you shoot footage?

Having limits forces you to plan things out to focus on your VISION, it also instills a bit of discipline. These days the amount of footage you can capture is virtually unlimited limited only by storage and compression you choose to use. Unlimited takes can burn out your talent. Shooting unnecessary footage takes up a lot of space that someone ultimately needs to review, store, edit.

The consequence of large file sizes instills discipline when shooting. Rather than rolling every second of your shoot day, what if you stop for a moment to frame up, before you press record? What if you really think about what your looking for in that variation from take to take.

You learn to respect the number of takes you can do with your talent because, just like time, your storage is finite. This ultimately has a bearing on your overall shoot because the focus shifts to capturing quality from the beginning to the end of the take.

I’ve seen productions where they put extra cameras in different formats everywhere (if is capturing a one-take live stunt, I can see how that make sense). But if your shooting a more narrative cinematic style, putting up too many cameras can quickly muddle up the vision. Capturing too many perspectives can yield vanilla in the edit room.

Quality
Capturing the entire latitude your sensor is capable gives you & clients the flexibility to grade and experiment with tone. Having the ability to mold your footage visually can take your work to new levels. With filmmaking you’re already spending the time and money to point your camera to capture something worthwhile whether it’s actors or B-roll. Why not capture the most information possible?

Folks spend so much money and time acquiring the latest and greatest camera technology, only to hamstring it by capturing compressed footage with limited archival potential?

In five years, when debayering algorithms continue to improve, your footage has the ability to look better because you made the wise choice of capturing all that your camera could offer. If you shot something raw, it still has the potential to look great 10-20 years later.

Intention
While shooting countless hours has become cheap. Digital also allows us to shoot hundreds of takes continuously without resting talent. What are you really looking to capture? Editors have to look at all of these countless hours of footage. As filmmakers are we serving up more quality footage, or is it just more of the same?

My system is limited to 4 Terabytes of SSD storage, which is roughly 4 hours of raw footage at 4K. It’s not a lot of space, but it keeps me organized. My projects tend to be 2 minutes or less. So my shooting ratio is about 4 hours for two minutes. Once I finish a project it forces me to clear it out and keep things moving.

My goal is to capture enough footage for a 2 minute story, at the highest quality possible. Depending on your deliverable this might not work for everyone.

TLIP0000594_0086484 corrected

Film Scientist ACES Workflow Revisited

Below is a detailed methodology for my 12bit F35 ACES workflow using an AJA LUT box.


F35 to AJA LUT box to Gemini

Begin with the F35 Camera set to a base ISO of 450 (0db). Frame rate should be set to _24 fps 12 bit (not 23.98) with S-Log Gamma and S-Gamut. Connect the dual link IF 4:4:4 outputs to 3G inputs of the AJA LUT box, the output on the LUT box should be taken from 3G single link output which converts the F35’s 12bit PsF signal to a true progressive signal the Gemini Recorder can accept. A 512 GB memory card will yield roughly 37 minutes @12bits/24 fps. Use Convergent Design’s transfer tool to unpack 12bit files to 16bit, otherwise Davinci will not be able to decipher the 12bit DPX files.)

AJA_lutbox
ACES setup in Davinci

Import media to Davinci (I’m using v10.2, because of node issues on v11 due to an old video card). In master project settings, set project to Davinci ACES color space. Since there isn’t a native IDT readily available for the F35 camera within Davinci, leave IDT alone. We’ll use a 3D Transform LUT to replicate the IDT. Set ODT as SRGB (if your grading on a computer) or Rec 709 (if you’re going out to Broadcast/Bluray)

davinci aces colorsrgb

Transform LUT

inverse
Apply the attached transform LUT on the timeline to all your clips; it will serve as a replacement for the IDT. This 3D LUT transforms S-Gamut to ACES and S-log to linear, without affecting color in a negative way so you can apply it to all your F35 footage as a neutral base. It places the footage in an optimal area for ACES so you can begin grading and make a minimum of adjustments.

Film Scientist ACES LUT

Grade
Color correct your whites, blacks and grays on the waveform.
Tweak color using the vectorscope as guide. Throw in an overall curve to taste.
Or if you are on Davinci 11, and have a One Shot Card you can use the automatic color match based to skip the manual color correction. While the color match within Davinci is technically accurate I still prefer to adjust the sliders myself (in a minimalist fashion) to get to a similar slightly cleaner result, then I proceed to grade it.

one shot

one shot click

one shot grid

Denoise
Apply Neat Video to denoise
Because the uncompressed 12 bit files provide such a huge amount of real data, Neat video can do a pretty amazing job of recovering all the detail and while clearly identifying all the color information that was captured. If you get a good shot of the gray card, you can get a 90% quality level when creating a camera profile which does wonders for differentiating noise from detail. The ability to generate a picture with no compression artifacts is pretty amazing.

denoise

The reason to use ACES instead of yRGB.
ACES takes the output medium into consideration so corrections stay within intended gamut and no information is lost. In the future, when rec2020 monitors become available you will simply need to switch an ODT rather than re-color-correcting for a new medium. Think of ACES as a huge coloring box with unlimited crayons. By transforming all the data into an even larger ACES color bucket, and shifting the log curve back into linear space all the data original is retained, you get crisp and clean data while manipulating your F35 footage. When you grade in it, you don’t lose any information because ACES space contains every color your monitor could possibly produce. Working in linear gamma also allows you to easily intercut footage to other cameras or cg elements without pesky color science getting in the way.

TLIP0000564_0086649

Capturing 12-bit Uncompressed 4:4:4 with the Sony F35

Ever since I began shooting with the Sony F35, my hope was to record its 12bit 444 uncompressed signal to access all the data the camera was capable of delivering. With the solution below, there are no more limits to capturing every subtle color the amazing Sony/Panavision CCD chip is capable of discerning. The combination of a 12-bit 4:4:4 originated file, coupled with S-Log gamma and S Gamut color space gives us the ability to capture a reasonably sized digital negative that is every bit as good as raw, with minimal processing overhead during post production.

The Existing Market

12bit recording options for the F35 had been…

1. Sony SR-R1 (big/reliable/expensive/power hungry)
a ‘monitor-less’ fairly sizable stand alone recorder (4k+) that writes to very expensive media (3-5k), and requires a proprietary transfer station (~1k). The 12bit signal is recorded to a flavor of Sony’s proprietary SR format @ 800Mb/s. Marketing specs touted an uncompressed DPX option for the recorder, but it was never released.

2. Codex (big/reliable/very expensive)
an even more expensive solution (5k+), that offers uncompressed 12 bit, but also requires a proprietary transfer station (10k+) which is twice as expensive as the recorder. While the recording media is rock solid, it’s equally bulky, proprietary, and expensive.

3. Sound Devices (small/storage slightly less reliable/economical/not uncompressed)
makes a small 12bit 444 recorder that records to economical common media. It needs a multiplexer to convert the F35’s dual stream HD-SDI to single cable 3G-SDI, and records to space saving 12bit 4444 Pro Res, but if opting to use an F35 in the first place, my preference is to record completely uncompressed so artists aren’t limited by ProRes compression artifacts while doing VFX or compositing work.

Ultimately, I wasn’t a fan of the options above due to their bulk, expense, power consumption, or compression schemes. In the end, the Gemini 444 became my recorder of choice, due to its small form factor, low power consumption (6 to 8 watts), fault tolerant media, and its ability to record to compressed DNxHD. (Unfortunately, the DNxHD codec option was vaporware, a marketing feature shown on multiple spec lists, that sadly never came to fruition on the Gemini). In the past, the combination of Gemini & F35 have been limited to 10-bit, which looks great, but recording in 12-bit provides even more levels of luminance (4096 per channel vs 1024), and translates to even smoother tones when stretching out those gamma curves.

Gemini – The 12 bit Capable Recorder

The Gemini was advertised as a 12-bit recorder, but its ability to capture a 12-bit signal was primarily tested on the Canon C500. Out of the box, it did not recognize Sony’s 12 bit signal.

After testing every combination and permutation of signals imaginable between the two devices, I realized the recorder didn’t sync with Sony’s particular 12-bit PsF scheme. The Gemini displayed the camera’s 12-bit signal on the monitor, but refused to record it. After communicating with Convergent Designs through email about the issue they made a note of it, but it didn’t seem like any new firmware releases were on the horizon due to their heavy development resources on the Odyssey. I held onto the hope that they would one day update the Gemini firmware to recognize Sony’s PsF signal, sadly they discontinued development this past year and moved all of their resources onto full time development of the Odyssey. This meant the 12 bit PsF issue on the Gemini would never be addressed in firmware, nor would DNxHD ever exist for the Gemini. The same 12bit PsF issue permeates the Odyssey recorder, but as the F35 market is quite small, I don’t hold much hope that the PsF issue will be addressed in their software at this point.

The Solution

For some reason, I still felt that recording a 12-bit signal from an F35 on the Gemini was possible (if the signal was converted or re-timed to SMPTE 424 3G single link.) I played with different brands of multiplexers in hopes of serving up a progressive signal the Gemini would record. After about a year of testing multiple brands of multiplexing devices, and waiting for technology to advance, I finally found ONE device…

The AJA LUT box. 🙂

AJA_lutbox

It recognizes the F35’s dual link 12bit PsF signal, and converts it to a single link 3G 12bit Progressive signal that the Gemini can recognize!

F35 + AJA LUT box + Gemini = 12bit 444 in full uncompressed glory!

This combination allows us to record the best imagery the camera has to offer while retaining a small and efficient form factor. Coupling a used Gemini + AJA LUT box, allows us to forego multi-thousand dollar SR data modules or Codex mags. Media transfer also becomes a breeze with cheap Seagate USB3 or Thunderbolt transfer shuttles. While the Gemini is discontinued, the bonus is that all the major software/producion kinks have been worked out at this point. While this solution still costs a couple thousand, it provides a cheap alternative to Alexa that yields a picture that is no less stunning. The only limitation for capturing great imagery is your own imagination for story telling.

Final Thoughts

Six years after the F35’s initial launch, it’s nice to know that capturing a full 12bit uncompressed signal (from arguably the best CCD technology offered to date), only requires the use of two small devices that together weigh no more than a couple pounds. No more large, unwieldy, power hungry recorder boxes.

While the introduction of the Arri Alexa shortened the F35’s production window, my hope is that the two items above will give the F35 an even longer life. With its increased color sensitivity, the F35 definitely holds its own against Alexas and REDs. Like a Pioneer Kuro, vacuum tubes, or motion picture film, there are technologies that don’t scale to mass production or mass consumption. 250 thousand dollar cameras, 7 thousand dollar plasmas, and 1000 foot film magazines are going the way the dodo bird, BUT this doesn’t mean CCD technology, plasma, film technologies are any less powerful, just less cost effective in making a profit, or less scalable given consumer’s ever increasing desires. While I like to tinker with new & cheap tech, I still relish in the fact that Sony and Panavision created an unparalleled CCD chip that still holds up well against modern day sensors. The fact that the F35 has comparable imagery so many years later is a testament to Sony’s great engineering and Panavision’s elegant sensor design.

Attached are a couple uncompressed DPXs for you to play with…
DPX 12bit test

grey card screen grab_crop

Blackmagic Design 4K Raw – initial raw testing, pattern noise, and going back to basics

INTRO

Due to its price point and stunning image quality, the Blackmagic 4K is quite a groundbreaking camera! It takes all the right things that filmmakers need: raw image control, low cost, ease of use & global shutter; and integrates it into small package (less than 5 pounds) using non proprietary SSD storage devices. The camera’s simplified workflow and tight integration with DaVinci allows filmmakers to reach new creative possibilities. Comparable equipment used to cost many tens of thousands of dollars just a few years ago. This technological progress gives us access to resolution and color fidelity was previously only accessible to the very high-end productions.

Despite the camera’s amazing capabilities, Blackmagic’s 4K camera comes with several disadvantages to be aware of: low sensitivity which compromises the camera’s dynamic range and reveals pattern noise in certain situations.

At this price point, we can’t have it all, yet…

EXPOSURE IS EVERYTHING

With this new 4K sensor technology, comes great responsibility, namely the need for proper exposure. In the past five years, we’ve been gifted with technology that allows us to make pretty pictures without knowing much of about exposure, dynamic range, gamma, etc….or lighting.

Unfortunately, in terms of exposure, this camera requires us to be dead on, otherwise we will experience the dreaded fixed pattern noise. From my simple testing, the resolution is awesome, but I feel the specs are being generous about sensitivity and dynamic range. In a world where we are used to ‘what you see is what you get’, things like log, raw, linear , and gamma are terms we need to get a better grasp of.

Ultimately, it is still a garbage in/garbage out world in terms of data. If we take  care to feed this sensor with lots of controlled light, we are rewarded with amazing images. But if the image is underexposed, you will get the dreaded fixed pattern noise. If you overexpose, some highlight information will be clipped. And because dynamic range seems less than advertised, it means we have less room for the highlight information in those upper stops.

So whether recording ProRes or raw on this camera, I feel there is minimal room for exposure error. While we are able to work with raw data in spades, it does seem nonsensical that there isn’t huge leeway to over or underexpose with this amount of data, but it all comes down to base sensitivity.

BEFORE RAW

When I first purchased the camera, it was only capable of encoding to Prores. I wasn’t in love with the color science that was baked into the encoding, nor did I enjoy the heavy pattern noise present in all the low light footage. So the camera, became more of a toy for experimenting with 4K these past several months while I fondly waited for BMD to release the raw capabilities promised upon its release. While it was pretty annoying to hold onto a 3,000 dollar camera with so many limitations, I had faith in their future software development regarding their camera. My hope with their raw firmware release, was that it would help tame pattern noise so I could  get the chance to utilize this camera in more professional environments. While poor QC or laboratory standards may allow poor assembly line tolerances to let defective product through. As a working filmmaker I simply need a camera to function in ‘mission critical’ situations without worries that the imagery may be plagued with problems like fixed pattern noise that I cannot see on the LCD screen. It feels like I’ve traded price and time, for reliability. While I am not a fan of being a beta tester for an up and coming hardware manufacturer, I definitely applaud Blackmagic’s vision that pushes the likes of Sony or Canon into releasing better products.

The worst part about the 4K camera before the new firmware, was that I couldn’t use on jobs because it seemed so unreliable. 800 iso was useless, 400 was marginally usable iso in low light, and 200 iso seemed to lose dynamic range. I avoiding using it on gigs because it felt so limited, and clients don’t like hearing excuses about defects or potential problems in production environments. Reputation is everything in situations where clients are paying good money for a shoot, Blackmagic’s reputation regarding camera technology left much to be desired before their latest firmware update. If a piece of technology fails, it’s ultimately on me for picking it or not having a suitable replacement as a DP or Producer.

FIRMWARE GLEE / INITIAL DISAPPOINTMENT

With the release of their raw firmware last week, I had new hope for BM’s 4K camera. My initial feeling  when I first loaded the firmware and shot a few raw 4K clips was utter glee. I exposed the images to my eye, color corrected and graded the footage in DaVinci. Everything looked good on the small computer screen, until I rendered the footage out and reviewed it pixel for pixel on a larger screen, only to see once again…Pattern Noise. 🙁

After my initial disappointment and reading many forums, articles, and petitions about the pattern noise issues I thought about figuring out post workarounds. But then I thought to myself… would Blackmagic Design with its bevy of engineers really truly release a camera that was not to spec? Who should I believe? Should I listen to the filmmakers who had grown up in this new digital age with 5Ds, GH1s, and FS700s? Or a believe a company like Blackmagic who has a staff of engineers and programmers who make/purchased one of the best pieces of grading software out there? The truth always lies somewhere in the middle. Before I decided to cast this camera aside once and for all, I had to really test it out for myself using my old film school methodology from long ago (…a light meter). I wanted peace of mind about whether it truly worked to spec. How did the marketing spec compare to the real world?

BACK TO BASICS

To find a solution to the dreaded fixed pattern noise (or reduce the appearance of it), I had to go back to basics of using a light meter. Which meant going to the store to buy a battery for it (because I hadn’t used it in forever…) Lighting by eye with the help of a waveforms and RGB parade was how I worked now. Before the Blackmagic 4K camera, I had the luxury of becoming lazy with metering because sensors had become so amazingly sensitive. It’s the norm to see sensors with base ISOs of 850 to 1250 and 12+ stops of latitude, so it allowed for plenty of mistakes in exposure. And living primarily in an 8-bit HD world (where rec 709 is still king) and data is compressed to a of 6 total stops, there was still plenty of room for error while still generating a nice result. On day 2, I decided to shoot with a light meter using available light.

While Blackmagic Design does a great job of marketing all this amazing camera technology into a small concise package, no one really tells you the best way to implement their technology. Namely, facts and figures on where to expose middle grey, or light sensitivity or signal to noise ratios of the sensor given specific lighting situations.

TESTING (Take 2)


https://vimeo.com/99447742>


I went back to basics and started metering each scene, and shooting a grey card & focus chart for scene reference. The grey card gave me a known baseline for exposure, and the focus chart was my simple reference for balancing color. Please note these shots were entirely lit by sunlight coming through cream curtains that diffused the light. While the tendency might be to correct the color to give the appearance of clean white light. The room and focus chart had more of an orange/cream hue overall. So based on the light that was shining on it, even the grey card was less neutral in real life.

Based on the screengrab above (and Art Adam’s table of waveform values below) it looks like middle grey is hitting at 25%-30% percent with BMD film gamma correction. I am not really sure  where 18% grey is supposed to hit on this camera? If anyone knows the value I would love to know.

http://www.dvinfo.net/article/post/resolve-10-waveform-values-for-the-unsure.html

To escape (or reduce) the dreaded fixed pattern noise, this camera ironically enough needs to be exposed properly (raw does not cure all). Iso 400 still has a hint of pattern noise in the dark areas, while Iso 200 is clean. From my basic testing, BMD’s camera seemed to have a much thinner exposure envelope due to its lack of sensitivity which is exacerbated by the pattern noise. While I still would rate the base ISO of this camera at 400, in low key dark scenes I would overexpose by 1/3 stop, and in bright, high key situations adjust anywhere from -1/3 stop to -2/3 stops  to adjust for clipping. Raw doesn’t necessarily give us the latitude to be off, but it does reward us if exposure is right on. I consider those bottom 2 stops non-existent in terms of holding any recoverable detail.

In all the shots, I metered the scene at T2.0 and set my lens at f2.0. Except the scene with the fruit, that shot was metered at T4.0 and the lens was set to f4.0, highlights were slightly clipped, so I probably needed to go 1-stop down.

If you want to play with the DNGs below. Please note the clip settings: BMD Film Gamma + Color Space, Color Temp 5600. I added an S-curve after the color was balanced.

davinci settings 4k

What I learned from my simple raw tests are that if light levels are too low, then we have to light a scene to increase contrast, and avoid lifting the noise floor during grading. The camera’s sensor noise is very dependent where you intend to tonally place the darker parts of the scene. So you should be very aware of where your want your black point to be in the scene when you’re shooting, and light from there.

In situations where contrast ratios are too high, we also need to add or bounce light, to reduce contrast, and avoid clipping the highs. It’s back to Film 101, with this camera.

Despite having access to a large amount of raw data, things like pattern noise can’t be fixed in post without heavy time consuming workarounds. Especially since pattern noise is one of those things that seems to change with scene exposure and sensor temperature as the day progresses.

CONCLUSION

I am still pleasantly surprised with the level of control we now have at our fingertips. This type of resolution and color fidelity was inaccessible to just a few years ago. BMP4K remains a great camera if you have the patience to light, meter your scenes, AND grade the footage properly in post. It’s not necessarily a documentary or run-n-gun camera, but it is very capable if you have consideration for its low light sensitivity and limited dynamic range. Which means if the scene is too dark we need to light it to bring up the noise floor, or if scene contrast is too high we also need to light it to bring the scene into balance.

While it’s advertised as a 12 stop camera, it feels more like 10 stops (which is still plenty to create amazing imagery). If we could reach deeper into the noisier areas of the exposed image without pattern noise, then we could probably realistically rate it as an 11 to 12 stop camera as the literature states. But at this point its current iteration w/Raw it doesn’t seem to exhibit the same latitude as the 13 stop BM pocket camera. In time my hope it that they implement firmware to reduce pattern noise so we can reach into the shadows and deliver images to their fullest potential.

TIPS

In the end, use a light meter rate it at 400, light for your dark tones. Use iso 200 if your outdoors and have plenty of light. Never use iso 800.

in low key dark scenes overexpose by 1/3 stop,

in bright, high key situations adjust anywhere from -1/3 stop to -2/3 stops to adjust for clipped highlights.

If possible shoot a grey card + color chart for each scene to use as a reference for exposure and color during grading.


SINGLE DNGs


https://www.dropbox.com/sh/13funlxbua9j0bd/AAAxbf-tTOhB6NU4obuJD3lJa;


canon_17-120

NAB Exhibits Recap 2014

atomos_wide

This was my fourth time attending the exhibits at NAB, it was an educational experience, and I definitely saw it with different eyes this time around. I enjoy checking out the new developments from year to year, but it’s easy to get bleary eyed from the constant barrage of sales pitches, products, and demo stations. NAB is like a big science fair/new car lot on steroids for film, video, and broadcast folks. Some companies have flashy booth setups with great gear to test, while other companies have booths that are quite disorganized and look like they slapped together the night before. In the end it’s great to see products in real life, and ‘kick the tires’.

Every year I am fascinated by the marketing approaches from the big companies like Canon, Sony and Pansonic, vs. up-n-comers like RED, Go Pro, Atomos and Blackmagic. The ‘Bigs’ seemed very focused on educating the masses with their demo stations, while the smaller companies seem to be working extra hard to generate an emotional brand allegiance, some through use of sexy models (Red / Atomos), or rally cries (Go Pro).

This year on the show floor it seemed like 4K was everywhere, yet nowhere. There was lots of equipment to capture it, but very few displays or projectors to properly display it. I wished there was more compelling 4K content to see  from Canon (they were still showcasing the ’Man and Beast’ 4K short film from last year.) RED had a nice ‘6K’ Theater, which I cover below. While I saw a lot of new equipment that recorded in 4K, lots of cameras and lenses touting it as the thing I need next. There seemed to be too few screens doing it justice. Maybe next year’s NAB will be centered more around displaying 4K in its full glory. I hope we can move beyond rec709 and 8 bit displays sooner rather than later. While 4K is an amazing capture medium, it helps to be in the right viewing environment to truly appreciate the difference.

Canon

canon_theater

Canon had great 4K calibrated live grading setup  with a (roughly 14′) projection screen about 10 feet away from the viewing audience. The room showcased their ACES workflow process with a live C500 setup. It was the only setup in the entire NAB show floor that really seemed to show the real staggering difference between rec 709 (HD) and rec 2020 (4K) color spaces. It’s hard to notice the reason for 4K on the show floor when most screens displaying it are so small. Ironically, despite the increase in resolution the biggest differences I noticed in their setup was color and tonality. Watching a comparison between  rec709 and rec 2020 was an eye opening experience that brought to life the best reason for the 4K standard… a much better color gamut.

Below are a few of booths that caught my attention.

6K theatre

RED
This year, RED created an amazing 6K movie theatre, it was comparable to a premium experience at your local cineplex. They spared no expense, stadium seating, 0-gain screen, and a seriously killer Meyer Sound System. They projected three reels in their presentation: 2K Hollywood movies, 4K user footage, and a 6K short film. While visuals projected in their 2K ‘Hollywood’ reel and 4K user demo were really outstanding, I felt the 6K/IMAX experience was a little disappointing. While the 6K short film was a technical showcase that somewhat demonstrated resolution and sensitivity to a certain extent, the subject matter made it difficult togauge the difference because there was a great deal of motion blur/whip pans in the imagery. The short film consisted of a nighttime car chase through the streets of LA, lots of fast edits. It was quite a camera torture test, but I couldn’t help but wonder whether it truly showcased the total capabilities of 6K in terms of resolution and latitude. When moving a camera around so quickly are we really getting 6K or even 4K? While all this technology is wonderful… it really reminded me that content is king, and despite technology, a 2K or 4K showcase can be just as compelling as 6K if you have killer content. Nonetheless, the 6K Dragon sensor is definitely capable of capturing amazing imagery. I just wish I saw a better demo/content demonstrating it.

canon larry thorpe

Canon
I truly enjoyed Canon’s hourly informational sessions from industry professionals, their behind the scenes video on camera configurations from filmmakers @ Vice was quite informative. Larry Thorpe was also awesome at breaking down complex information about Canon’s tech into digestible information that normal folks could understand. Listening to well respected industry industry professionals is the main reason I attend NAB. While playing with the gear is interesting, I love listening to ASC DPs glean a little bit of their professional experience and share their cool anecdotes. One speaker shared a tidbit about Inception’s visual effects being rendered out at 8K because rendering at lower resolutions didn’t match up well the original film footage.

sony_cut_outsonyF65_17-120

Sony
Sony always seems to have the same booth setup every year, they create some of the best camera hardware, but in terms of marketing I wish they did a better job of letting the world know about some of their really great solutions. There is a lot of great technology on display, but you don’t necessarily notice their innovations because their booth feels kinda sterile and hidden. While RED goes to great lengths to tout that are on the bleeding edge, Sony seems to take a subtler approach. Some of their best equipment seems to get lost in the the noise of other companies marketing strategies. As I walked around their booth, the F65 is as impressive as ever, their color rendition on the show floor was awesome. They had an interesting setup with showcased a live 1080 cut-out from their 8K/4K sensor. The cutout was tack sharp and just as colorful as the full frame image, It was quite a sight to see. Another section showed live grading control of the F65 through wifi. Compared to the newer (camera) kids on the block, the F65 more than holds its own and remains one of the best out there. I would love to see Sonny put a better spin on the technology they do showcase, they need a guy like Larry Thorpe explaining their amazing tech.

sonyf65_color

BlackMagic
I wanted to be excited about their booth, but I am disappointed with their quality control & delivery issues on current cameras. After seeing announcements about two new cameras, I can’t help but wonder if they’re more concerned about selling widgets, than fixing existing issues on current cameras, and keeping current customers happy. Although I applaud their price points for their new products, in the future I want to avoid being an unwitting beta-tester/customer for their cameras. I patiently waited through literally years of pre-orders to finally get a 4K camera, only to see fixed pattern noise @ higher iso’s and styrofoam bits inside the CMOS housing upon first opening the box. I can only hope they start to consider the importance of working out QC issues and getting stated camera features to work out of the box.

AJA
AJA’s new LUT-box is exciting, it will be big game changer for my editing workflow. I’ve always wanted to apply custom LUTs to my external monitors without the need to render a LUT in my software editor or bake it into my dailies. The ability to load custom LUTs will definitely help us all streamline the workflow for log and raw footage, and reduce the rendering overhead. I look forward to AJA’s software and hardware integration, their implementations tend to feel a little more bug-free and straightforward than Blackmagic products.
http://www.aja.com/en/products/mini-converters/lut-box

atomos_samurai

Atomos
Their new recorders look really good, and they also win the award for the hottest product specialists (Topless women with bodypaint were a unique Vegas). Atomos is not a company I would have considered in the past, but their Shogun recorder looked great, as did the Samurai. They both had very sharp bright screens, their implementation of waveforms & RGB parade was also super sharp and clear. The navigation of their menus is simple and fluid, very Apple-like in response. Interacting with their new products in person is giving me second thoughts about picking up an Convergent Design Odyssey, their UI implementation on the Shogun looks pretty snappy and compelling.

Convergent Design
Convergent Design is a solid company, they make well engineered recorders. The verdict is still out on the Odyssey for me.
The screen is pretty large and clear, but their waveform implementation doesn’t feel particularly high res to me (Atomos’ screen menu implementation seemed a little more seamless and snappier). The Odyssey records DPX and ProRes for anything under 30fps. Convergent has a road map for utilizing additional recording codecs in the future, but I am wary about purchasing goods that have promised features in the future. I purchased a Gemini recorder with the understanding that they would also implement compressed recording codecs (as their marketing materials indicated) The compressed codecs never materialized on the Gemini, and the recorder was end-of-lifed before any compressed codecs were added.

My three favorite products from NAB 2014.

canon_17-120

1. Lens
Canon 17-120 2.95
The overall color was very impressive on the show floor. Zoom speed is quick, snappy, and smooth. For being a S35mm lens it has good size and weight, no larger than traditional ENG lenses. Although its only 2.95 from 17-90mm (ramping to 3.9 @ 120mm), sharpness and color look really great. The lens covers both wide and tele zoom ranges for ENG or cinema applications and it’s fairly lightweight given the range that is covered.

I saw this lens displayed in the Canon and Sony booths, in both settings the lens was paired with a Sony camera. In the Canon booth, it was paired with an F55. Compared to the HD setups around it, the color looked great, much more saturated than the other HD screens and lenses next to it.

In the Sony booth the 17-120 was paired with an F65, showcasing a live 1080p cutout from a 4K sensor data. This demonstration clearly showed the extreme sharpness that the lens is capable of. In this setting I pointed to lens to a light source to gauge flaring and chromatic aberration in a high contrast objects. I was pretty impressed with its resistance to flaring, bokeh was smooth, and it had minimal chromatic artifacts. (I understand an NAB booth is by no means a true test, but it did provide a real world setting that showed me how well this lens performs.)

I think it was interesting decision that Canon chose to showcase their newest lens with a Sony Camera instead of the C500. I guess Sony must be doing something right with their 4K color.

http://www.usa.canon.com/cusa/support/professional/lenses/cinema_lenses/cine_servo_17_120mm_t2_95_pl

canon_booth_17-120cineo_closecineo_back

2. Lighting
Cineo XS
The Cineo XS LED panel was the most impressive fixture on the show floor for me. It was pumping what looked like 4-5k of light output (while consuming about 1k of wattage.) A light like this gets us pretty close to those big boy HMI’s, without the extra heat, and within the confines of house circuits. The CRI is fairly high depending on the chosen color temperature (mid 90’)s. The cost of the phosphor plates was the only thing that seemed somewhat pricey, but for the amount of light it outputs, this quality of light is quite an achievement… It’s able to achieve high output (5K tungsten equivalent) without wasting output through diffusion + low heat + low power consumption. This one is a winner. Hopefully I can add it to my kit in the future.

http://www.cineolighting.com/index.php/pages/product_xs/140

3. Stabilization
DJI Ronin
This looks like it will be the first well built, mass market stabilizer to come in at a reasonable price without that DIY feel. With the lessons learned from their Phantom helicopter, I have no doubt their firmware and software will be top notch. When it’s finally released, this might be the brushless gimbal system for the rest of us.

http://www.dji.com/info/news/dji-ronin-coming-soon

Random tid bits

Hive
I wanted to like their fixtures, plasma definitely seems like a worthwhile technology, but compared to HMI, the fixtures just didn’t seem to have enough punch to comparable HMI wattage. I specifically checked out their Plasma Flood light through a Chimera. At 10 pounds and 276 watts, it definitely felt like a 200w or less soft light source, so I wasn’t too excited based on the size and weight of the fixture. I wanted to like it, but would still prefer a 200w HMI, when factoring size, weight, and punch.
http://www.hivelighting.com/bee-flood/

Wooden Camera
C-Box looked pretty dope, a little expensive but it’s a seamless & useful way to convert HDMi to SDI and power ancillary devices without leaving much of a footprint if you use v-mount or Anton bricks.
http://woodencamera.com/C-Box-HD-SDI-Gold-Mount.html

wooden_camera

Solid Camera
They displayed an economical and well built support for Convergent Design’s Odyssey
http://www.solidcamera.com/#!odyssey/cn11

Redrock
They showcased their ‘one man crew’ slider. Not much else to see at the booth this year.

Prism

Sony F35 ACES workflow

I always wanted to utilize an ACES workflow with the F35 Camera, but attempting to re-create a workflow for a camera that was popular 5 years ago with economical off-the-shelf software was like a needle in a haystack… Existing grading software that utilized proper F35 IDTs cost many thousands of dollars, and newer software skipped this particular camera, only including IDTs for the F65, and F55.

Why bother with ACES?

Because it maps the color of each camera to achieve consistency amongst various brands and allows for closer seamless integration of CG elements. By utilizing an image device transform (IDT), ACES removes the secret sauce/color science of each camera manufacturer (meant to hide the deficiencies of each), and transforms and linearizes the data/light captured from the imaging device without losing any information.

In the purest sense, an IDT maps what the sensor data captured into a distinct, discreet numbers that correlate to the predefined ACES color workspace (which encompasses more than our eyes can see). In order to utilize ACES correctly, it requires the use of an IDT (image device transform) to properly map the camera’s luminance values, a reference rendering transform (RRT), and output device transfrom (ODT), eg. our monitor or projector. Without them, we’re just doing random transformations without a common baseline.

My search for a usable implementation of the F35 IDT led me through a deep rabbit hole where I downloaded random Japanese software from Sony & played with outdated rudimentary cineon and rec709 luts. 1D LUTs are a great intermediary step, and I still wanted to use them in the offline stage, but I felt they were ultimately destructive to the data in the grading stage. My search ultimately led me to a simple solution that uses After Effects, OCIO, and LUT Buddy.  Hopefully this blog saves you the headache I went through to find a low cost/workable ACES solution for this amazing camera…

The Goal

My original goal was to create a render-less editing workflow that allowed me to apply a proper 3D LUT /log dailies transform to uncompressed log DPX files in Premiere (Sort of a one-box solution with final output through After Effects.) Using an SSD/Thunderbolt setup, I wanted to edit with the original files and eliminate the need to create dailies or have the option of changing them at any given time. I also wanted workflow that took me straight to finishing without excessive roundtripping. This process still requires rendering in the timeline, but allows us to utilize the same original log files throughout the entire process (and avoids those strange gamma shifts when using formats like ProRes.) I am able to output in 10bit from Premiere using 3D LUTS if I’m in a rush or I can proceed to finish in After Effects in full 32bit floating point.

The Method

It starts with After Effects, and you will need to download the free plug-ins listed at the bottom of this page.
Option 1: apply IDT transform using OCIO, create dailies LUT that removes the log and maps all the S-Log values accordingly.
Option 2: apply IDT transform, grade using Colorista plug-in, output a graded LUT that we can use for offline editing.

The process is pretty basic,
apply LUT Buddy effect to desired clip,
select a ‘Draw Pattern’
pattern: (3D 32)
(This will read the original RGB data that is baked into the file, before transformations)
add OCIO effect to same clip, click on ‘convert’ button, change settings to:
(configuration: aces)
(input: slogF35)
(output: aces)
add second OCIO effect to clip, this time click on ‘display’ button, change settings to:
(input: aces)
(transform: RRT)
(device: sRGB)
(OPTION2: add Colorista effect or perform additional grading if needed
apply additional LUT Buddy effect to clip, select ‘Read Pattern’
pattern: (3D 32)
click ‘Options…’ menu s
select ‘Export LUT’, for file format select Apple Color (.mga)

Apply the mga. LUT to clips in Premiere for an offline LUT.

OCIO becomes our ACES foundation for any grading in After Effects.

Overall Finishing Pipeline

DPX > load single clip to AE > create dailies LUT

Apply dailies LUT to DPX footage  in Premiere > Dynamic Link > AE

Finish in AE (ACES), track, composite, etc…

General notes:

Make sure to set up working space in After Effects to 32bits per channel.
In order to playback uncompressed DPX files you need a disk subsystem capable of +350MB/s (at 24fps the computer is moving 200MB/s, not including audio)

Why go to the trouble of doing this?  What are the Benefits?

1. The proper gamma transform for F35 footage gives us solid a neutral reference to begin the grading process . White point, black point and gamma RGB, are properly mapped according to the camera’s S-Log spec.
2. Once the proper F35 IDT is applied, the footage needs fewer adjustments and color transformations to make it look good. If you’re capturing the footage as intended by the S-Log spec the footage should look pretty good, requiring minimal grading to get the image looking good/right.
3. It’s a simple, free solution that runs on slightly older mac computers if you have fast drives.
4. To my eye, the ACES mapping in After Effects gives the skin tones a more natural look than starting from scratch or using a basic LUT, and also allows us to use the full power of After Effects 32bit floating point pipeline.
5. No longer have to commit to baking in a LUT onto dailies footage or have multiple sets of original files. I love the latitude of working with uncompressed 2K files which allows me to do more things in one box without excessive round-tripping.
6. Allows ability to test different LUTs or grades while editing in Premiere.
7. LUTs created easily translate to other finishing programs allowing us to work with elements from different apps and be assured that color/gamma is consistent across them all.

Software you will need to download:

OpenColor IO for After Effects
http://fnordware.blogspot.com/2012/05/opencolorio-for-after-effects.html
This plug-in is the missing link for obtaining a working F35 IDT! That you Brendan! OpenColorIO is Sony’s solution for color management. It’s a very smart way in dealing with color in scene linear. OCIO is how the big boys like Sony Imageworks deal with color. It removes all our problems associated with the different gammas of quicktime and ProRes… Color matches from app to app.

DPX Plus
Free plug-in that allows us to read all flavors of DPX in Premiere and After Effects…
http://fnordware.blogspot.com/2012/06/dpx-plus.html
(Brendan also makes other awesome plug-ins that are really valuable for VFX pipelines. Check out his EXR plug-in. EXR is a great file format created by the godfather of visual effects ILM.  EXR is the go-to file format for most finishing pipelines because of its openness and expandability.

LUT Buddy for Premiere, LUT Buddy for AE
http://www.redgiant.com/products/all/lut-buddy/
This plug-in reads and creates look up tables. It’s free and allows us import 3D LUTs into Premiere, apply to clips in one fell swoop. It gives us the option to output 10bit color quickly from Premiere, or move back to a 32bit floating point color pipeline for finishing in AE. The demo of the software suite should include a copy of LUT Buddy.

Sony F35 Camera Mojo
With the early R&D help of Panavision, Sony used its sizable resources to develop an amazing CCD chip that captured a color gamut wider than film. It’s basically one of the first and last ccd’s made in the S35mm size before the CMOS fabrication process became mainstream. The red, green and blue dyes on the F35 CCD were some of the most accurate of their day, but it made the chip very expensive to produce. Color science is a big thing on this camera, and short of the F65 or maybe the latest Alexa,  I feel few cameras capture better color. The F35 CCD is natively balanced to a color temperature of 3200K so the sweet spot for the sensor is based on standard tungsten lighting, skin tones and warm sources look great. Most CMOS silicon chips today have a native color temperature of 5000K. So while many CMOS chips are great at capturing the blue sky and daylight, they tend to be a little more deficient or clinical when it comes to skin tones. While we can pump up the deficiencies with grading, it’s one of the few cameras that capture full resolution RGB color data per its output resolution.  I hope this blog entry can help shift back our conversation to capturing and translating color tonality & dynamic range, the true hallmarks of S35mm film. While newer camera have great resolution, and bring out every wrinkle, crease, or imperfection, I would like to say that the motion pictures we saw in the past 50 years never resolved much beyond 2K by the time they were projected in theaters (IMAX notwithstanding).  So even after five years this camera still captures great tonality, and offers a similar creamy, luscious look that we loved with film.